
The Frustration of Failing to Clip into SPD Pedals
Cycling enthusiasts, both new and seasoned, have undoubtedly experienced the vexing frustration of failing to clip into SPD (Shimano Pedaling Dynamics) pedals. It’s a moment of sheer exasperation when your foot refuses to secure itself to the pedal, leaving you wobbling or struggling to regain balance. This recurrent issue can transform an otherwise enjoyable ride into a series of disheartening setbacks. In this article, we delve deep into the intricacies of SPD pedal engagement to help you conquer this frustration once and we also discuss the question can’t clip into SPD pedals?
Picture this: You’re all geared up, eager to embark on a picturesque cycling adventure. The wind whispers promises of freedom and the open road beckons. But as you approach your bike, the simple task of clipping into your SPD pedals becomes a seemingly insurmountable challenge. The harder you try, the more elusive the engagement feels. This vexation not only saps your enthusiasm but also raises safety concerns as your feet struggle to find their place on the pedals.
The Importance of Proper SPD Pedal Engagement
Proper SPD pedal engagement is far more than just a matter of convenience; it’s a fundamental aspect of cycling performance, safety, and comfort. The pedals serve as the crucial connection between your body and the bike, facilitating efficient power transfer and control. Failing to achieve secure engagement can compromise your cycling experience in several ways.
1. Efficiency:
Efficient pedaling is the cornerstone of a successful cycling journey. When you can’t clip into your SPD pedals, power transfer becomes inefficient. Your pedal strokes lose their smoothness, and energy is wasted as you struggle to maintain your rhythm. This inefficiency not only tires you out faster but also reduces your speed and endurance.
2.Safety:
Cycling involves a fair share of unexpected challenges, from sudden stops to evasive maneuvers. Without secure pedal engagement, your feet may inadvertently slip off the pedals in critical moments, increasing the risk of accidents and injuries.
3.Comfort:
Unsuccessful attempts to clip in can lead to discomfort and hotspots on your feet. Prolonged pressure and friction in the wrong areas can cause discomfort or even painful blisters. This discomfort can overshadow the joy of your ride and discourage you from cycling.
4.Confidence:
Confidence is key to mastering any sport, and cycling is no exception. Failing to clip into SPD pedals can dent your confidence as a cyclist, making you apprehensive about challenging terrains and group rides. Confidence in your equipment can significantly boost your overall cycling experience.
5.Longevity:
Constantly struggling with pedal engagement can lead to premature wear and tear on your shoes and cleats. Replacing these components frequently can be costly, so mastering the art of clipping in not only enhances your cycling but also prolongs the lifespan of your gear.
Understanding SPD Pedals
What Are SPD Pedals?
In the world of cycling, SPD pedals, short for Shimano Pedaling Dynamics, represent a groundbreaking innovation that has transformed the riding experience for countless cyclists. But what exactly are these pedals, and what sets them apart from their conventional counterparts?
At their core, SPD pedals are a type of clipless pedal system designed to enhance cycling performance. The term “clipless” may seem paradoxical, as it suggests a lack of clips, but in reality, it refers to the absence of traditional toe clips and straps. Instead, SPD pedals rely on a cleat-to-pedal connection that enables riders to secure their feet to the pedals.
The defining feature of SPD pedals is the small, metal cleat that attaches to the sole of cycling-specific shoes. These cleats have two holes, which align with the corresponding bolts on the SPD pedal itself. When the cleat engages with the pedal, it creates a secure connection that allows for efficient power transfer from the rider’s legs to the bike’s drivetrain.
SPD pedals come in various designs to suit different cycling disciplines, from road biking to mountain biking and everything in between. The versatility of SPD pedals is a testament to their adaptability, making them a staple in the cycling world.
How Do SPD Pedal Work?
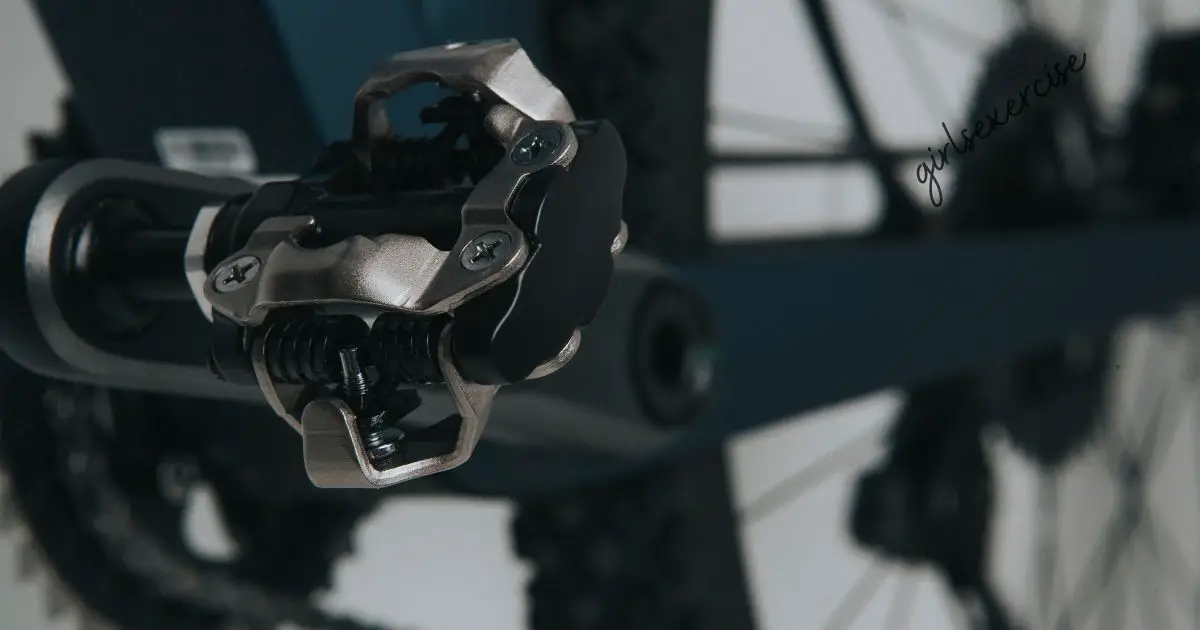
To understand how SPD pedals work, let’s break down their mechanics step by step. When you look at an SPD pedal, you’ll notice a few key components:
1.Pedal Body:
The main body of the pedal, which is attached to the crankarm of the bicycle.
2.Cleat:
A metal or plastic plate attached to the sole of the cycling shoe. It features two holes that align with the pedal’s engagement mechanism.
3.Engagement Mechanism:
This is the heart of the SPD pedal. It consists of a spring-loaded system that clamps onto the cleat when you step down on it.
Now, let’s explore the process of how SPD pedals work:
1.Alignment:
As you approach the pedal, you align the holes on your cleat with the corresponding bolts on the pedal.
2.Engagement:
With a decisive downward motion, your shoe and cleat engage with the pedal. The engagement mechanism’s springs provide resistance and secure the cleat in place with a reassuring click.
3.Locked In:
Once engaged, you’re securely locked into the pedal. This connection allows you to apply force to the pedals throughout the entire pedal stroke, not just when pushing down. This maximizes your pedaling efficiency.
4.Release:
To disengage, you twist your heel outward. This motion disengages the cleat from the pedal, freeing your foot for quick and easy removal.
Why Are They Popular Among Cyclists?
SPD pedals have earned their popularity among cyclists for several compelling reasons, making them a preferred choice for riders of all levels and disciplines.
1.Efficiency:
SPD pedals offer superior power transfer compared to flat pedals. With your feet securely fastened to the pedals, you can apply force during both the upstroke and downstroke of each pedal revolution, resulting in a more efficient and energy-conserving ride.
2.Control:
Cycling with SPD pedals provides a heightened sense of control. Your feet remain firmly attached to the bike, allowing you to navigate technical descents, climb steep hills, and tackle unpredictable terrain with confidence.
3.Comfort:
The snug fit of SPD cleats in cycling shoes ensures that your feet remain stable and well-supported throughout your ride, minimizing discomfort and hotspots. This is especially important for long-distance cycling.
4.Versatility:
SPD pedals are incredibly versatile, suitable for a wide range of cycling disciplines, including road cycling, mountain biking, touring, and commuting. This adaptability makes them an excellent choice for cyclists who enjoy diverse riding experiences.
5.Safety:
The secure connection between the cleat and pedal reduces the risk of your foot slipping off during sudden stops or unexpected maneuvers, enhancing overall safety on the road or trail.
6.Pedal Options:
Shimano, the pioneer of SPD technology, offers a variety of SPD pedal models to cater to different rider preferences, from single-sided entry for beginners to dual-sided entry for experienced cyclists.
Common Issues with Clipping In
The “Can’t Clip In” Dilemma Explained
The frustration of not being able to clip into your cycling pedals can be likened to trying to fit a square peg into a round hole. It’s a situation where the seamless connection between rider and bike eludes you, leaving you feeling perplexed and exasperated. To resolve this dilemma, it’s essential to understand the underlying causes and common scenarios that lead to clipping failures.
Imagine gearing up for an exhilarating ride, adrenaline coursing through your veins, only to find yourself struggling with your pedals. The “can’t clip in” dilemma is a prevalent issue that affects cyclists of all levels. At its core, this problem arises when the cleat on your cycling shoe fails to engage with the pedal’s locking mechanism effectively. This can manifest as a feeling of instability, a lack of power transfer, or simply the inability to secure your foot to the pedal.
Common Scenarios Leading to Clipping Failures
1.Dirt and Debris Accumulation
Deep Dive:
Dirt and debris are the arch-nemeses of pedal engagement. Over time, your cycling shoes and cleats can accumulate tiny particles from the road or trail, obstructing the smooth engagement between the cleat and the pedal. These foreign particles create a barrier, preventing the cleat from securely locking into place.
Solutions:
Regularly inspect and clean your cleats and pedals before each ride. A small brush or compressed air can help dislodge trapped dirt. Keeping shoe covers or gaiters can also be a preventive measure, especially during off-road excursions.
2.Worn Out Cleats
Deep Dive:
Cleats are not immortal; they wear down with use. As they lose their original shape and thickness, they become less effective at engaging with the pedal mechanism. This wear and tear can lead to an unreliable connection, resulting in frequent clipping failures.
Solutions:
Periodically inspect your cleats for signs of wear, such as rounded edges or visible damage. Replace them as needed, adhering to the manufacturer’s recommendations. Regularly check your pedal engagement to ensure it remains secure.
3.Incorrect Cleat Positioning
Deep Dive:
Cleat positioning plays a pivotal role in successful engagement. If your cleats are misaligned or positioned too far forward, backward, or at an angle, it can make clipping in a challenging and frustrating experience.
Solutions:
Consult with a professional bike fitter to ensure your cleats are positioned correctly. They will consider factors like your natural pedal stroke, foot alignment, and riding style to determine the optimal placement for your cleats.
4.Tension Adjustment Problems
Deep Dive:
Many clipless pedals come with tension adjustment mechanisms that control the force required to clip in and out. If these settings are too tight, it can make clipping in feel like an uphill battle.
Solutions:
Experiment with your pedal’s tension adjustment to find the sweet spot that offers a balance between secure engagement and ease of release. Start with a lower tension setting and gradually increase it until you find the level that suits your preferences.
5.Footwear Compatibility Issues
Deep Dive:
Not all cycling shoes are compatible with all types of clipless pedals. Mismatched cleats and pedals can lead to difficulty in clipping in or even complete incompatibility.
Solutions:
Ensure that your cycling shoes and cleats are compatible with your specific pedal system. Manufacturers usually provide compatibility information in their product documentation. If you’re uncertain, consult a bike shop expert for guidance on selecting the right footwear for your pedals.
Diagnosing the Problem

Step-by-Step Troubleshooting Guide
Clipping issues can put a damper on your cycling experience, but fear not, as a systematic troubleshooting approach can often pinpoint the problem. In this comprehensive step-by-step guide, we’ll delve into each aspect of diagnosing the problem when you can’t seem to clip into your SPD pedals.
1. Check for Dirt and Debris
Deep Dive:
The accumulation of dirt and debris on your cleats and pedals is a common culprit behind clipping difficulties. Tiny particles can find their way into the engagement mechanism, hindering a secure connection.
Solutions:
Begin by thoroughly examining your cleats and pedals. Use a small brush or compressed air to remove any lodged dirt or debris. Pay close attention to crevices and corners where grime tends to accumulate. Regularly cleaning your gear before rides can prevent this issue.
2. Inspect Cleats and Pedals
Deep Dive:
Over time, both cleats and pedals can suffer from wear and tear. Worn cleats may no longer engage properly, while pedal mechanisms can become damaged or lose their springiness.
Solutions:
Inspect your cleats for signs of wear, such as rounded edges or visible damage. Replace them following the manufacturer’s recommendations. Examine your pedals for any visible damage or irregularities in the engagement mechanism. Regular maintenance and periodic replacement of worn components are essential for consistent performance.
3. Assess Cleat Position
Deep Dive:
Cleat positioning is a critical factor in successful engagement. Misaligned or incorrectly positioned cleats can make clipping in a challenge.
Solutions:
Consult with a professional bike fitter to ensure your cleats are in the right position. Factors like your natural pedal stroke, foot alignment, and riding style should be considered when determining the optimal cleat placement. Correcting cleat positioning can significantly improve your ability to clip in.
4. Examine Tension Adjustment
Deep Dive:
Most clipless pedals offer tension adjustment settings that control the force required to clip in and out. If the tension is set too high, it can make clipping in feel difficult and strenuous.
Solutions:
Experiment with your pedal’s tension adjustment to find the ideal balance between secure engagement and ease of release. Start with a lower tension setting and gradually increase it until you achieve the desired level of comfort and security. Regularly reviewing and adjusting tension settings can enhance your clipping experience.
5. Evaluate Footwear Compatibility
Deep Dive:
Not all cycling shoes are compatible with all clipless pedal systems. Mismatched cleats and pedals can lead to ineffective engagement.
Solutions:
Ensure that your cycling shoes and cleats are compatible with your specific pedal system. Manufacturers typically provide compatibility information in their product documentation. If you’re unsure, seek guidance from a knowledgeable bike shop expert who can recommend the appropriate footwear for your pedals.
Cleaning and Maintenance: Elevating Your SPD Pedal Care
Properly Cleaning SPD Pedals: The Art of Pedal Purification
Your SPD pedals, the steadfast companions of your cycling journey, deserve meticulous care and maintenance. Properly cleaning these vital components is an art that not only ensures smoother rides but also prolongs their lifespan.
Deep Dive:
Over time, the accumulation of dirt, grime, and debris in the recesses of your SPD pedals can hinder their performance, potentially leading to clipping issues. Cleaning your pedals is not a mundane task; it’s a symphony of care and precision.
Effective Cleaning Solutions:
1.Pedal Removal:
Begin your pedal cleansing ritual by gracefully removing them from your bicycle. This act grants you unhindered access for a thorough cleaning and inspection.
2.Gentle Dirt Disposal:
Utilize a soft-bristle brush or the tender caress of an old toothbrush to whisk away dirt and debris from the pedal body and engagement mechanism. Your attention should be particularly devoted to the areas around the release spring, where grime often seeks refuge.
3.Cleansing Bath:
Your pedals delight in a soothing bath of mild soapy water. Employ a sponge or cloth to delicately cleanse the pedal surface, ensuring that even the threads receive this cleansing embrace.
4.Rinse and Air Dry:
Rinse the pedals generously with clear, clean water to eliminate any lingering soap residue. Allow them to bask in the open air, their equivalent of a spa day, air drying completely, or lovingly pat them dry with a clean, dry cloth.
5.Lubricate with Care:
Apply a modest amount of bicycle-specific lubricant to the pedal threads, but exercise caution to avoid any interaction with the engagement mechanism. This lubrication is akin to a soothing massage for your pedals, fostering a serene, smooth pedal rotation.
6.Reattachment with Tenderness:
Reattach the pedals to your bicycle with a gentle hand, ensuring that you adhere to the manufacturer’s recommended torque specifications. It’s akin to returning a cherished painting to its rightful place.
Regularly engaging in this intricate ritual of cleaning your SPD pedals not only optimizes their performance but also serves as a safeguard against potential issues like dirt obstructing pedal engagement. By weaving this maintenance into your cycling routine, you elevate your ride to a realm of uninterrupted elegance.
Replacing Worn Out Cleats: Embrace Renewal with Elegance
Deep Dive:
Cleats, the unsung heroes of your clipless pedal system, bear the weight of your cycling endeavors. Over time, their efficacy wanes, potentially compromising your safety and comfort. Replacing worn cleats is not just a task; it’s a gesture of renewal and respect for your cycling experience.
Thoughtful Solutions:
1.Cleat Inspection with Tender Care:
Regularly inspect your cleats with the gentleness of a curator examining priceless artifacts. Look for signs of wear, such as smoothed edges or visible damage. Pay equal attention to the bolts that gracefully secure them to your cycling shoes, ensuring they are tenderly tightened.
2.Graceful Farewells:
Bid adieu to your worn cleats with grace, adhering to the manufacturer’s counsel regarding cleat replacement intervals. As a rule of thumb, cleats should be replaced every 3,000 to 5,000 miles or when wear becomes noticeable.
3.Cleat Compatibility Consideration:
Select new cleats with thoughtful consideration, ensuring that they harmonize effortlessly with your specific pedal system. Various manufacturers may offer cleats with subtle design nuances.
4.Precise Installation with Elegance:
When introducing new cleats, employ a torque wrench with a gentle touch to fasten the bolts in accordance with the manufacturer’s guidance. Avoid over-tightening, which can inadvertently harm the cleat or shoe.
Regularly replacing worn cleats is a poetic act of renewal for your cycling connection. It not only enhances your cycling experience but also reduces the risk of sudden disengagement, allowing you to embrace each pedal stroke with elegance.
Lubricating Pedal Mechanisms: Nurturing the Silent Allies
Deep Dive:
Proper lubrication of pedal mechanisms is akin to nurturing a garden— it promotes not just functionality but also longevity. It acts as a shield against corrosion and minimizes friction, elevating your pedaling experience to one of grace and efficiency.
Graceful Solutions:
1.Choosing the Right Lubricant:
Select a high-quality, bicycle-specific lubricant that resonates with your pedal type. Avoid generic oils or greases, which may inadvertently attract dirt and debris, disrupting the harmony.
2.Modest Application with Grace:
Apply a small amount of lubricant to the pedal engagement mechanism and moving parts with the tenderness of an artist applying the final brushstroke to a masterpiece. Beware of over-lubricating; excess can act as a magnet for undesirable elements.
3.Even Distribution with Elegance:
Employ a clean cloth or a dedicated applicator to distribute the lubricant evenly across the pedal surfaces, all the while treating your pedals with the grace of a concerto conductor. Work the pedals gently to ensure the lubricant caresses every nook and cranny of the internal mechanisms.
4.Eliminating Excess with Care:
After applying the lubricant, delicately remove any excess with the same care you would use to preserve a fragile heirloom, preventing it from becoming a repository for dirt and grime.
Regularly bestowing your pedal mechanisms with this graceful touch of lubrication is an act of nurturing. It paves the way for enhanced performance and longevity, elevating your cycling experience to one of refined and reliable engagement during your rides.
Regular Pedal Inspection Routine: Vigilance with Grace Pays Rich Dividends
Deep Dive:
Cultivating a regular routine to inspect your pedals is an art of vigilance that pays rich dividends. It helps in the early detection of issues, preventing potential breakdowns, and securing a safe and graceful riding experience.
Cleat Positioning: Precision for Peak Performance
The Importance of Correct Cleat Position: The Foundation of Your Ride
Cleat positioning is a fundamental aspect of your cycling setup, and its importance cannot be overstated. It forms the foundation upon which your entire riding experience rests. The correct cleat position ensures that your power is efficiently transferred to the pedals, enhancing both performance and comfort.
In-depth Insight:
Cleats are the crucial link between your cycling shoes and SPD pedals, and their positioning directly impacts your riding dynamics. An incorrect position can lead to discomfort, inefficiency, and even injury.
Why Correct Cleat Position Matters:
1.Efficiency:
Properly positioned cleats allow you to engage and disengage smoothly, reducing energy wastage and enhancing pedaling efficiency. Each pedal stroke becomes a precise transfer of power.
2.Comfort:
Correct cleat placement minimizes undue pressure points on your feet, reducing the risk of discomfort, numbness, and hot spots during long rides. Your feet become one with the pedals, enjoying a harmonious connection.
3.Injury Prevention:
Misaligned cleats can lead to overuse injuries, such as knee pain and Achilles tendonitis. The right position ensures that your joints and muscles work optimally, reducing the risk of strain.
Finding the Optimal Cleat Placement: A Personalized Quest
Discovering the optimal cleat placement is akin to unlocking a personal secret to cycling bliss. It’s a journey of self-discovery and precision, and no two riders are exactly alike. Your ideal cleat position is unique to your body, riding style, and preferences.
Navigating the Path:
1.Experimentation:
Start with a neutral cleat position and make incremental adjustments. Test different positions, noting how each one affects your comfort and power output. A professional bike fit or a knowledgeable coach can provide valuable guidance.
2.Alignment:
Pay attention to the alignment of your cleats. Ensure they are symmetrically positioned and that your feet are in a natural, comfortable angle when clipped in. An asymmetrical setup can lead to imbalances and discomfort.
3.Cleat Fore-Aft Position:
Fine-tune the fore-aft position of your cleats to align with the ball of your foot, which is the primary power point. This ensures optimal power transfer and minimizes the risk of knee strain.
4.Rotational Adjustment:
Experiment with the rotational angle of your cleats. A slight rotation can alleviate potential discomfort, especially for riders with specific biomechanical needs.
Fine-Tuning for Comfort and Efficiency: The Art of Optimization
Fine-tuning your cleat position is the art of optimization. Once you’ve identified a baseline position that suits your riding style, it’s time to refine the details for enhanced comfort and efficiency. This is where the subtleties matter, and small adjustments can yield significant results.
Crafting Perfection:
1.Gradual Changes:
Make changes in small increments, whether it’s adjusting the cleat angle or fore-aft position. This prevents sudden discomfort or adverse effects on your riding.
2.Feedback Loop:
Continuously gather feedback from your rides. Pay attention to any discomfort, fatigue, or changes in power output. These cues can guide your fine-tuning process.
3.Professional Insight:
Consider consulting a bike fitter or experienced cyclist for their insights. They can provide valuable guidance on optimizing your cleat position based on your unique physiology and riding goals.
4.Regular Review:
Cleat positioning isn’t a one-time endeavor. As your fitness, riding style, and goals evolve, periodically revisit your cleat position to ensure it remains aligned with your needs.
Tension Adjustment: Balancing Control and Comfort
Understanding Tension Adjustment Mechanisms: Unveiling the Power of Control
Tension adjustment is a feature that grants you control over your SPD pedals, making them adaptable to your cycling preferences. It’s crucial to understand these mechanisms fully to harness the power they offer in fine-tuning your riding experience.
Exploring the Mechanisms:
SPD pedals typically have tension adjustment mechanisms that control how tightly your cleats are held in place. These mechanisms consist of spring tension settings that affect the ease of clipping in and out.
Types of Tension Adjustment Mechanisms:
1.Spring Tension:
Most SPD pedals have a tension adjustment screw or dial. By turning this, you can increase or decrease the spring tension, which determines how firmly your cleats are held in place. Higher tension means a more secure connection, while lower tension makes it easier to disengage.
2.Multiple Release Angles:
Some pedal models allow you to choose between multiple release angles, enabling you to customize the ease of clipping out. This feature is particularly useful for riders who desire quick and easy disengagement.
3.Dual-Sided Tension:
Certain SPD pedals have dual-sided tension adjustment, meaning you can adjust the tension separately for each side of the pedal. This fine-tuning allows you to have different tension settings for each foot, catering to individual preferences or accommodating specific riding conditions.
How to Adjust SPD Pedal Tension: Tailoring Your Ride
Knowing how to adjust SPD pedal tension is akin to wielding a tool that can transform your cycling experience. It’s a process of tailoring your pedals to your unique needs, whether you prioritize security during intense climbs or effortless disengagement during leisurely rides.
Mastering the Process:
1.Locate the Adjustment Screw or Dial:
Identify the tension adjustment feature on your SPD pedals. It’s typically a screw or dial located near the pedal’s engagement mechanism.
2.Choose Your Starting Point:
Before making adjustments, note the current tension setting. This serves as your reference point in case you want to revert to the previous setting.
3.Adjust Gradually:
Start by making small, incremental changes to the tension. Turn the adjustment screw or dial clockwise to increase tension for a firmer grip or counterclockwise to decrease tension for easier disengagement.
4.Test and Iterate:
After each adjustment, take your bike for a test ride. Pay attention to how it feels during cl
Tension adjustment is a powerful tool that empowers you to fine-tune your SPD pedals to match your riding style and needs. It’s an art of personalization, where every turn of the adjustment screw or dial brings you closer to the perfect balance between control and comfort on the road.
The precision of connection hinges on cleat compatibility—the next vital piece of the puzzle. Though small, cleats play an outsized role in establishing a secure and efficient link between your cycling shoes and SPD pedals. Ensuring that your cleats are well-matched with both your shoes and pedals is essential.
Navigating Compatibility:
1.Cleat Types:
SPD pedals typically employ two-bolt cleat systems. However, it’s crucial to confirm that your cleats are tailor-made for your specific pedal model, as variations do exist.
2.Meticulous Cleat Placement:
Cleats must be meticulously positioned on the sole of your cycling shoes. Adhere to the manufacturer’s guidelines to achieve precise placement, ultimately optimizing your pedal engagement.
3.Harmony with Shoe Drillings:
Confirm that the cleats you select align with the drillings on the sole of your cycling shoes. Some shoes boast multiple drillings to accommodate various cleat positions, providing you with further customization options.ipping in and out. Continue making gradual changes until you achieve the desired balance between security and ease of use.
Balancing Security and Ease of Use: The Art of Personalization
Tension adjustment is all about finding the sweet spot that suits your riding style and preferences. It’s a delicate balancing act between security and ease of use, and achieving the perfect balance is an art.
Finding Your Balance:
1.Security:
If you prioritize a secure connection, higher tension is your ally. This setting ensures your feet remain firmly attached to the pedals, making it ideal for aggressive riding, sprinting, and climbs.
2.Ease of Use:
On the other hand, lower tension settings provide easier engagement and disengagement, perfect for leisurely rides or for those who want the freedom to clip out quickly in unexpected situations.
3.Adaptability:
The beauty of tension adjustment is its adaptability. You can tweak the tension according to your riding goals and conditions. For instance, you might opt for higher tension during competitive races and lower tension for relaxed group rides.
4.Safety Considerations:
Regardless of your preference, always consider safety. Ensure that your cleats release reliably when needed, especially in emergency situations.
Ensuring Proper Cleat Compatibility: The Precision of Connection
The precision of connection hinges on cleat compatibility—the next vital piece of the puzzle. Though small, cleats play an outsized role in establishing a secure and efficient link between your cycling shoes and SPD pedals. Ensuring that your cleats are well-matched with both your shoes and pedals is essential.
Navigating Compatibility:
1.Cleat Types:
SPD pedals typically employ two-bolt cleat systems. However, it’s crucial to confirm that your cleats are tailor-made for your specific pedal model, as variations do exist.
2.Meticulous Cleat Placement:
Cleats must be meticulously positioned on the sole of your cycling shoes. Adhere to the manufacturer’s guidelines to achieve precise placement, ultimately optimizing your pedal engagement.
3.Harmony with Shoe Drillings:
Confirm that the cleats you select align with the drillings on the sole of your cycling shoes. Some shoes boast multiple drillings to accommodate various cleat positions, providing you with further customization options.
4.Vigilant Cleat Maintenance:
Routinely inspect your cleats for any signs of wear and tear. Cleats that have seen better days may not engage with the pedals as effectively, potentially compromising your overall riding experience. Replacing them when necessary is key.
Tips for Selecting the Right Footwear: Your Cycling Cinderella Moment
Embarking on the quest for the ideal cycling shoes that seamlessly complement your SPD pedals can be likened to discovering your own Cinderella moment in the world of cycling. Here are some invaluable tips to guide you in this pivotal selection process:
1.Riding Style Reflection:
Reflect upon your predominant riding style. Are you primarily a road cyclist, a dedicated mountain biker, or a pragmatic urban commuter? Different styles often demand specialized shoes tailored to specific terrains and conditions.
2.Sizing Precision:
Prioritize comfort and security by ensuring that your chosen shoes fit snugly yet comfortably. It’s essential to recognize that cycling shoes generally possess a snugger fit compared to regular shoes. Be open to trying various sizes and brands to unearth your perfect fit.
3.Sole Stiffness Assessment:
Take note of the stiffness of the sole. Stiffer soles facilitate superior power transfer, although they may be less accommodating for walking. The choice should align with your specific riding objectives and preferences.
4.Closure System Contemplation:
Deliberate over the closure system of the shoes. Options abound, encompassing Velcro straps, ratchets, or BOA dials. Opt for the closure mechanism that affords you the desired adjustability and comfort level.
5.Climate and Ventilation Consideration:
Contemplate the climate of your riding locale and the duration of your typical rides. Shoes equipped with effective breathability and ventilation mechanisms are invaluable for maintaining cool, dry feet, particularly in warmer climates or during extended journeys.
6.Cleat Compatibility Confirmation:
Confirm that the shoes you’re eyeing possess the requisite drillings and slots to accommodate cleats. Some models offer the convenience of adjustable cleat positioning, enabling you to fine-tune your pedal engagement for that perfect fit.
Practice and Technique: The Artistry of Effortless Clipping
Developing Clipping Skills: Achieving Mastery Through Repetition
The graceful act of clipping into SPD pedals is akin to an art form, one that flourishes with practice and dedication. Whether you’re a newcomer to cycling or a seasoned rider, honing your clipping skills is a continual journey that enriches your cycling encounters.
Guiding Your Path to Mastery:
Achieving precision and ease in clipping involves a series of mindful steps:
Commence in a Controlled Domain:
Initiate your practice within a controlled, secure environment—think of an empty parking lot or a tranquil street. This setting minimizes distractions and potential safety concerns, permitting your full concentration on mastering this technique.
Select Your Dominant Foot:
Determine your preferred foot for leading when initiating the clip-in process. While many cyclists opt for their dominant right foot, the choice is ultimately a personal one, and comfort should be your guiding factor.
Unleash the Unclipping Skill:
Prioritize practice in unclipping before delving into clipping. Acquaint yourself with the sensation of disengaging from the pedals by gently twisting your heel outward. This skill is paramount for swift and fluid exits.
Repetition, Your Loyal Companion:
Repetition stands as the cornerstone of mastering the art of clipping. Immerse yourself in the motion of aligning your cleat with the pedal and securing it repeatedly. Over time, this practice bestows upon you a muscle memory that transforms clipping into an effortless ritual.
Tips for Seemless Clipping In: The Sublime Precision
The hallmark of a seasoned cyclist is the achievement of seamless clipping. Here are valuable tips to guide you towards this sublime level of precision when engaging with your SPD pedals:
Rely on Visual Alignment:
Employ your peripheral vision as your trusted guide, directing your cleat towards the pedal. Concentrate on the general alignment, and as you approach, your peripheral vision will gracefully assist you in effortlessly aligning the cleat.
Embrace Gentle Engagement:
Eschew the urge to exert force while inserting the cleat into the pedal. Instead, apply a gentle and even pressure; the engagement mechanism will naturally cradle your foot into a secure position.
Listen for the Subtle Click:
Most SPD pedals emit a distinctive and reassuring click or sound upon cleat engagement. Attune your senses to this auditory cue as it signifies the successful establishment of a connection.
Savor the Engagement Sensation:
Bestow your attention upon the sensation of engagement. You’ll discern a subtle click accompanied by the secure locking of the cleat into place. This tactile feedback offers invaluable confirmation of a secure attachment.
Practice Bilaterally:
To attain a well-rounded cycling prowess, devote yourself to the practice of clipping in with both feet. This equips you with equal proficiency on either side, a valuable asset across diverse riding scenarios.
Common Mistakes to Circumvent: Navigating the Pitfalls
Even seasoned cyclists may inadvertently commit common errors when engaging SPD pedals. Adhering to these guidelines can help you navigate these potential pitfalls and maintain a seamless riding experience:
Shun Hasty Maneuvers:
Resist the impulse to rush while clipping in, particularly during the commencement or Of your ride. Allow a brief pause for precise cleat alignment before engaging.
Limit the Downward Glance:
While it’s natural for novice cyclists to cast a fleeting glance at their feet during clipping, strive to reduce this tendency as you gain experience. Keeping your gaze on the road ahead enhances safety and fortifies your riding confidence.
Exercise Prudent Tension Adjustment:
Tread carefully when modifying pedal tension settings. Over-tightening can render clipping in and out a challenge, potentially elevating the risk of missteps.
Vigilant Cleat Care:
Regularly inspect your cleats for signs of wear and tear. Cleats in a deteriorated condition may compromise reliable engagement, leading to inadvertent disengagement or difficulties in clipping.
Cherish Pedal Maintenance:
Assure the well-being of your pedals by adhering to proper maintenance practices. Lubricate them as needed and clear away debris on a consistent basis to prevent interference with the engagement mechanism.
Mastering the finesse of clipping in and out of SPD pedals is a skill that flourishes with practice and experience. With steadfast dedication and the precise techniques, you’ll unlock the ability to engage your pedals effortlessly, thereby elevating your riding efficiency and overall cycling pleasure.
Alternative Solutions: Elevating Your Cycling Experience with Thoughtful Pedal Choices
When it comes to cycling, one often-underestimated component can significantly impact your performance, comfort, and overall enjoyment: your choice of pedals. It’s a topic that sparks a classic debate among cyclists, and the decision can be daunting. In this exploration of alternative solutions, we’ll delve into the intricate world of pedal choices beyond the widely known SPD (Shimano Pedaling Dynamics) pedals. Specifically, we’ll examine the following three facets:
Platform Pedals vs. SPD Pedals: The Pedal Dilemma
The first decision that confronts riders is whether to opt for platform pedals or SPD pedals, each presenting a distinct set of merits and considerations. Understanding these choices is paramount to ensuring your cycling experience aligns with your goals.
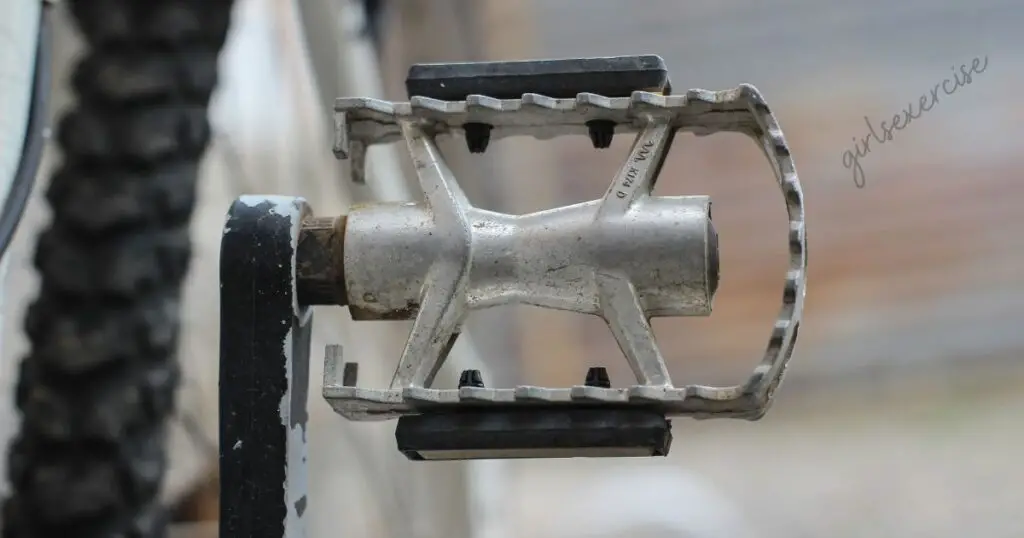
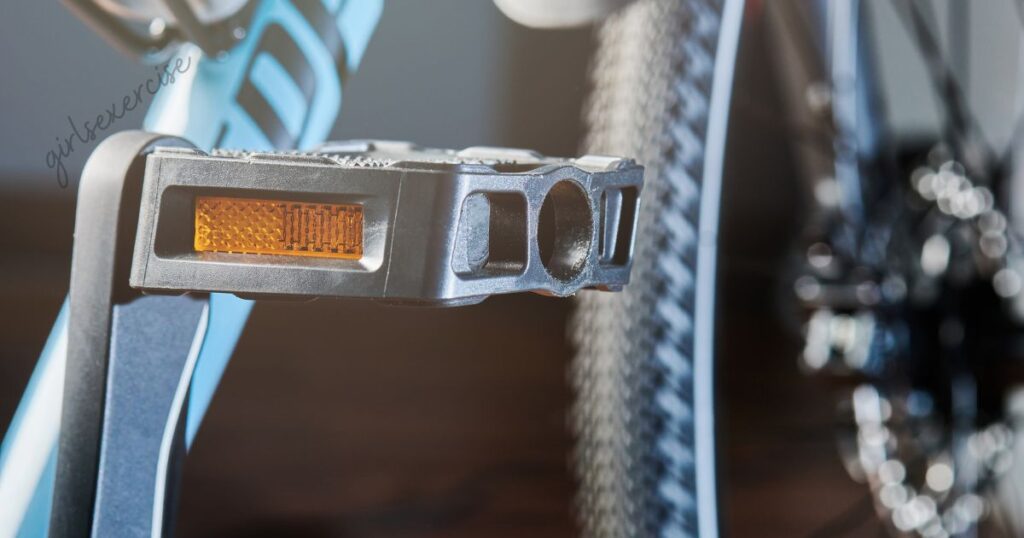
Platform Pedals: The Elegance of Simplicity
Platform pedals, often regarded as the embodiment of simplicity, offer an enticing solution for riders who prioritize ease of use and versatility. They feature a flat, broad surface that accommodates a wide range of footwear, from everyday sneakers to cycling-specific shoes. The connection they offer between your foot and the pedal is intuitive, making them an excellent choice for those who value quick and hassle-free entry and exit from the pedal.
Advantages of Platform Pedals:
1.Footwear Freedom:
Platform pedals liberate you from the necessity of specialized cycling shoes. This means you can hop on your bike in regular shoes, making them ideal for casual rides or urban commuting where convenience reigns supreme.
2.Seamless Entry and Exit:
With platform pedals, you needn’t worry about the nuances of clipping in or out. Simply place your foot on the pedal, and you’re off. This ease of use is particularly advantageous in urban cycling, where frequent stops are par for the course.
3.Versatility Defined:
Platform pedals are the true chameleons of the cycling world. They cater to a broad spectrum of riders, from those who relish leisurely rides to others who employ their bicycles for various purposes beyond conventional cycling.
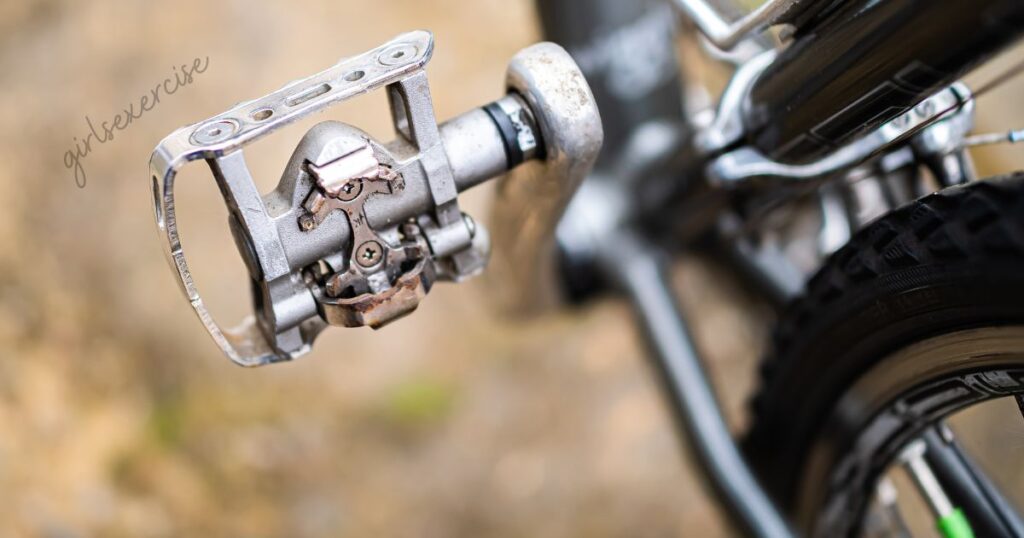
SPD Pedals: The Art of Precision
On the flip side, SPD pedals represent a more specialized facet of cycling. They are part of the clipless pedal system, requiring cycling-specific shoes equipped with cleats that lock into the pedal mechanism. While there is indeed a learning curve involved, SPD pedals boast an array of advantages that justify this transition.
Advantages of SPD Pedals:
1.Enhanced Power Efficiency:
SPD pedals establish an unyielding connection between your feet and the bicycle, resulting in superior power transfer. Every ounce of energy exerted through your pedal stroke translates into forward momentum with minimal dissipation.
2.Fatigue Reduction:
The stability offered by SPD pedals greatly minimizes foot fatigue during prolonged rides. With your feet securely locked in place, discomfort and numbness become far less likely, allowing you to embark on extended journeys with ease.
3.Unparalleled Control:
For cyclists navigating challenging terrains or embracing a more aggressive riding style, SPD pedals provide a unique edge. The unyielding connection empowers you to confidently tackle descents, conquer climbs, and navigate technical sections with precision.
Considerations for Switching Pedal Types: Pondering the Shift
For individuals contemplating a transition between pedal types, it’s imperative to ponder the shift thoroughly. Whether migrating from platform pedals to SPD pedals or vice versa, several factors merit careful consideration. This decision should harmonize seamlessly with your cycling aspirations and predilections.
Transitioning from Platform to SPD Pedals: Embarking on a Pedal Evolution
1.Footwear Investment:
When making the transition to SPD pedals, you’ll inevitably need to invest in compatible cycling shoes and cleats. While this may be a substantial consideration, the enhancement in your cycling experience often justifies the cost.
2.Learning Curve:
Be prepared for an adjustment period as you acquaint yourself with the mechanics of clipping in and out with SPD pedals. To ease into this new realm, consider undertaking initial rides in low-traffic areas where you can safely practice these new techniques.
3.Riding Style and Objectives:
Your cycling style and goals must inform your choice. If you prioritize performance, aspire to embark on longer journeys, or aim to conquer challenging terrains, SPD pedals are likely to become your steadfast companions, offering the power and control required for such pursuits.
Transitioning from SPD to Platform Pedals: Rediscovering the Freedom of Choice
1.Footwear Versatility:
One of the chief benefits of transitioning to platform pedals is the freedom to use a broader spectrum of footwear. This makes them ideal for casual rides, urban commuting, or any scenario necessitating frequent stops and varied footwear choices.
2.Adaptation Period:
As you transition to platform pedals, especially if you’ve been immersed in the world of SPD for an extended period, anticipate a brief adaptation period. The sensation of being unclipped from your pedals can be a refreshing but initially foreign experience.
Conclusion
Mastering the art of clipping into SPD pedals is a skill that combines physical technique, mental confidence, and experience. While it may seem daunting at first, with practice and patience, riders can overcome initial challenges and embrace the advantages of this pedal system.
Remember that the journey to proficiency in pedal engagement is unique for each cyclist. Whether you opt for platform pedals, SPD pedals, or dual-sided pedals, prioritize safety, and gradually build your skills. As you become more adept at clipping in and out, you’ll unlock a world of enhanced efficiency, control, and enjoyment in your cycling adventures.
FAQS On Can’t Clip Into SPD Pedals?
Why can’t I clip into my SPD pedals?
If you’re struggling to clip into your SPD pedals, the most common issue is misalignment. Ensure that the cleats on your cycling shoes are properly aligned with the pedal mechanism. Misalignment can make engagement difficult or impossible.
How can I tell if my cleats are misaligned?
Misaligned cleats can lead to difficulty clipping in. To check alignment, look at the position of your cleats. They should be flush with the grooves on the SPD pedals. If they’re not, adjust the cleats until they match the grooves.
What if my shoes have a lot of dirt or debris on them?
Dirt and debris on your shoes or cleats can hinder engagement. Regularly clean both your shoes and cleats to ensure a smooth connection. Use a brush or compressed air to remove any buildup.
I hear a clicking sound, but I’m not clipping in. What’s happening?
If you hear a clicking sound without successful engagement, it may indicate that the pedal tension is too high. Lower the tension gradually until you can clip in comfortably. Start with lower tension settings, especially if you’re new to SPD pedals.
Are my SPD pedals worn out if I can’t clip in?
Worn-out pedals can indeed affect your ability to clip in. Inspect the pedal mechanism for any signs of damage or excessive wear. If you notice any issues, consider replacing the pedals to restore a secure connection.


1 thought on “Can’t Clip Into SPD Pedals?”