
Are you struggling with the frustrating issue of “Can’t Clip Into Peloton?” If you’re an enthusiastic Peloton user, you know how essential it is to securely attach your cycling shoes to the bike’s pedals for an effective and safe workout.
Encountering difficulties while attempting to clip in can be a common and vexing problem that disrupts your exercise routine. In this article, we will explore the reasons behind the “Can’t Clip Into Peloton” issue and provide valuable insights on how to address and prevent it, ensuring a seamless and enjoyable Peloton experience.
Understanding the Peloton Experience
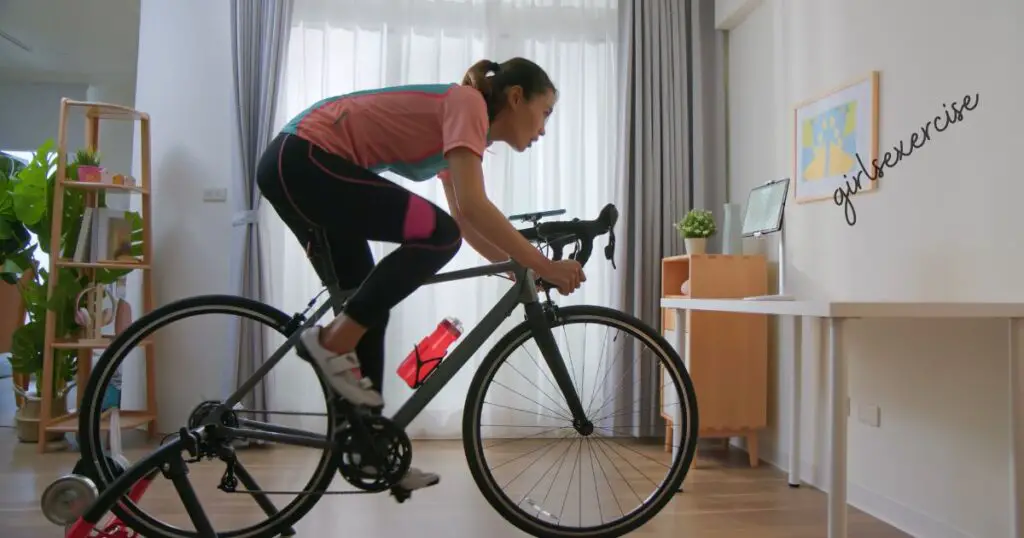
The Peloton experience is a journey into the world of cutting-edge home fitness, offering individuals the chance to transform their daily workouts into dynamic, engaging sessions. It goes beyond the ordinary, seamlessly blending technology, motivation, and community support. When you step into the world of Peloton, you’re not just getting on an exercise bike; you’re embarking on a holistic fitness experience that brings the gym to your living room.
Peloton offers an immersive platform where live and on-demand classes led by world-class instructors are just a few taps away. Whether you’re into cycling, running, strength training, or even yoga, Peloton has you covered. The real magic, however, lies in the sense of community that Peloton fosters. You’re not just sweating it out alone; you’re part of a global fitness community, sharing your achievements and pushing your limits together.
The Frustration of Clipping In
Amidst the exhilaration of the Peloton experience, there exists a common source of frustration for many users: the struggle to clip into the bike’s pedals. Clipping in is the crucial moment when your cycling shoes securely attach to the pedals, allowing you to pedal efficiently and confidently. Yet, for some, this seemingly simple task can turn into a vexing challenge, leading to wasted time and potential discomfort.
The frustration of not being able to clip in can disrupt your workout flow, leaving you feeling flustered and potentially compromising your performance. It’s a roadblock that can affect both beginners and seasoned riders. However, understanding and overcoming this issue is essential to fully enjoy the Peloton experience and unlock its potential for your fitness journey.
Purpose of the Article
The purpose of this article is to delve deep into the art and science of clipping into your Peloton bike. We aim to demystify the common issues that prevent a smooth clip-in, provide comprehensive troubleshooting guidance, and equip you with the knowledge and techniques to conquer this challenge confidently.
Through a step-by-step approach, we’ll explore the nuances of proper cycling shoe setup, identify the common culprits behind clipping difficulties, and offer practical solutions to ensure a seamless clipping experience every time. From understanding the role of cycling shoes to enhancing your workout experience and staying motivated, we’ve got you covered.
Our ultimate goal is to empower you to embrace the Peloton experience to the fullest, leaving frustration behind and stepping into a world where every pedal stroke is a step closer to your fitness goals. Join us on this informative journey as we unlock the secrets to effortless clipping and elevate your Peloton workouts to new heights of enjoyment and effectiveness.
The Importance of Proper Cycling Shoe Setup
The Role of Cycling Shoes
Cycling shoes are the unsung heroes of a rider’s gear, serving as the critical connection point between you and your bike. They are purpose-built footwear designed to optimize your cycling experience in ways regular sneakers or athletic shoes simply can’t match.
The role of cycling shoes is multi-faceted. Firstly, they provide a stiff and supportive sole that efficiently transfers power from your legs to the pedals. Unlike flexible sneakers, these shoes minimize energy loss, ensuring that each pedal stroke propels you forward with maximum force. This translates into greater speed, improved endurance, and a more efficient ride.
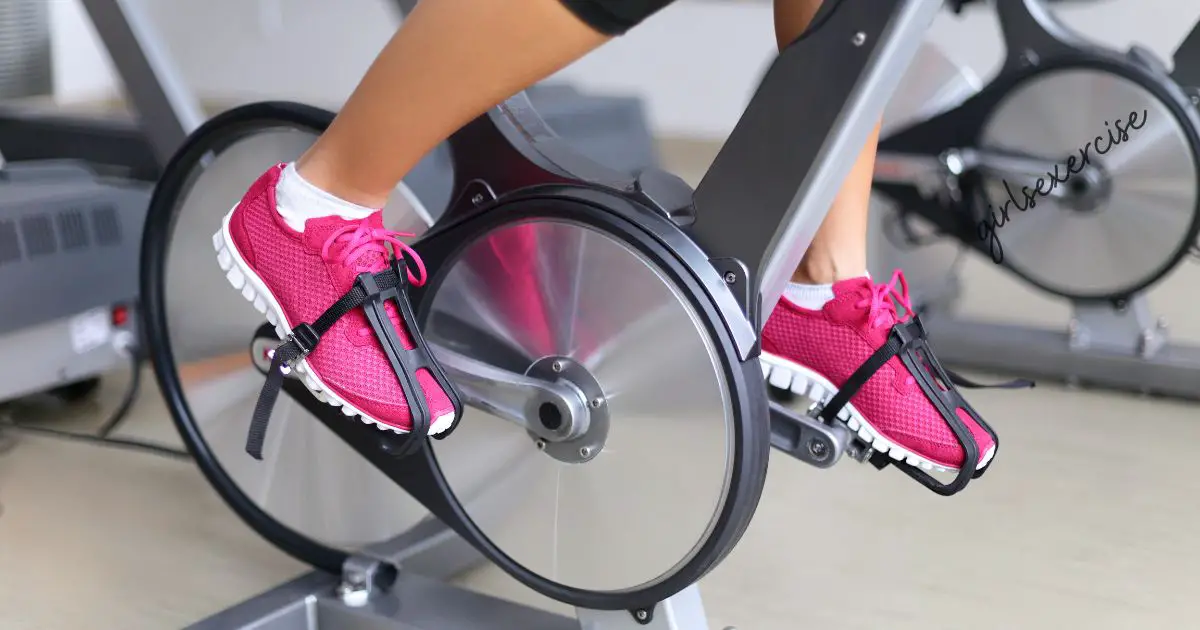
Secondly, cycling shoes come equipped with specialized cleat attachments. These cleats are designed to seamlessly engage with your bike’s pedal system, creating a secure and stable connection. This connection is essential for maintaining control and stability while cycling, especially during high-intensity efforts or when navigating challenging terrain.
Cycling shoes offer exceptional ventilation and moisture-wicking properties to keep your feet cool and dry, even during intense workouts. Their snug fit and secure closures help prevent the foot from slipping inside the shoe, reducing the risk of discomfort and hot spots that can lead to blisters.
In essence, cycling shoes are precision-engineered tools that enhance your performance, comfort, and safety while cycling. Recognizing their vital role is the first step towards achieving a fulfilling and effective ride.
Benefits of Proper Setup
1. Enhanced Efficiency
Properly setting up your cycling shoes can significantly enhance your riding efficiency. When the shoe is correctly aligned with the pedal, power transfer is maximized, and your energy is efficiently channeled into propelling the bike forward. This efficiency translates into faster speeds and the ability to sustain a higher level of effort for longer durations.
2. Reduced Risk of Injury
A well-fitted and properly adjusted cycling shoe reduces the risk of injury. Misaligned cleats or loose shoes can lead to discomfort, numbness, and even injury, such as knee pain or Achilles tendonitis. By ensuring your shoes are set up correctly, you promote a healthier riding experience, minimizing the strain on your joints and muscles.
3. Improved Comfort
Comfort is paramount during long rides. Properly set up cycling shoes provide the support and stability needed to prevent discomfort, hot spots, and foot fatigue. The precise fit and secure closures help distribute pressure evenly across your foot, reducing the risk of blisters and sore spots.
Common Issues Preventing Clipping In
Loose Cleats
One of the most frustrating obstacles riders encounter when trying to clip into their Peloton bike is loose cleats. Cleats are the small metal or plastic attachments on the bottom of your cycling shoes that connect with the pedals. When they’re not securely fastened, it can make clipping in a maddening challenge.
Loose cleats can occur due to wear and tear, inadequate tightening, or simply not paying attention to this crucial component of your setup. The consequences are far-reaching: not only does it hinder your ability to engage with the pedals, but it can also lead to an uncomfortable and unstable ride.
To resolve loose cleats, it’s essential to inspect and tighten them regularly. You’ll want to ensure they’re snug but not overly tight, allowing for easy entry and exit while maintaining a secure connection. By addressing this common issue, you’ll eliminate a major stumbling block to a smooth Peloton experience.
Misaligned Cleats
Cleat misalignment is another common culprit behind clipping issues on your Peloton bike. When your cleats are not correctly positioned on your cycling shoes, it can lead to discomfort, inefficiency, and even injury. Misaligned cleats may cause your feet to twist unnaturally, leading to knee pain, hip discomfort, and decreased power output.
Identifying signs of cleat misalignment is crucial. Look for uneven shoe wear, unusual pressure points on your feet, or a feeling of imbalance while riding. Properly aligning your cleats involves adjusting their position to match your natural foot angle, which can vary from person to person.
Regularly checking and fine-tuning cleat alignment is essential to ensure your comfort and performance on the Peloton bike. It’s a small adjustment that can make a world of difference in your riding experience.
Shoe Compatibility
Your choice of cycling shoes and their compatibility with your Peloton pedals can be a make-or-break factor in your clipping experience. Some cycling shoes may not be compatible with certain pedal systems, leading to difficulties in clipping in and out.
Shoe compatibility issues can arise from variations in cleat design, the type of pedal system on your Peloton bike, or even the age and condition of your shoes. When these factors don’t align, you’ll find yourself struggling to engage with the pedals, potentially disrupting your workout flow and causing frustration.
To address shoe compatibility challenges, it’s essential to ensure that your cycling shoes and Peloton pedals are a match. You may need to explore different shoe and cleat options or invest in adapter kits to bridge the compatibility gap. By doing so, you’ll eliminate this common barrier and enjoy a smoother, more hassle-free clipping experience on your Peloton bike.
Diagnosing the Problem
Identifying Loose Cleats
(1) Signs of Loose Cleats
Loose cleats can disrupt your Peloton ride and lead to frustration. Recognizing the signs of loose cleats is essential for diagnosing this issue:
1.Foot Slippage:
If you feel your feet slipping or shifting on the pedals while riding, it’s a clear indicator of loose cleats.
2.Audible Clicks or Clunks:
Unusual clicking or clunking sounds when pedaling can signal that your cleats need tightening.
3.Reduced Efficiency:
If your pedaling feels less efficient and you’re expending more effort than usual, loose cleats could be the culprit.
(2) How to Tighten Cleats
Tightening cleats is a straightforward process that can vastly improve your Peloton experience. Begin by locating the cleat screws on the bottom of your cycling shoes. Using the appropriate-sized hex key, gently tighten each screw. Be cautious not to overtighten, as this could damage the sole of your shoe. Ensure that the cleat remains correctly aligned throughout the tightening process. This simple adjustment can restore stability and efficiency to your Peloton ride.
Recognizing Misaligned Cleats
1. Signs of Misalignment
Misaligned cleats can lead to discomfort, inefficiency, and even potential injuries. Identifying the signs of cleat misalignment is crucial for diagnosing this issue:
2.Persistent Knee or Hip Pain:
If you experience ongoing pain in your knees or hips during or after a ride, it may result from misaligned cleats.
3.Uneven Shoe Wear:
Inspect the soles of your cycling shoes for uneven wear patterns, which can indicate cleat misalignment.
4.Inconsistent Power Output:
If one leg seems to work harder than the other while pedaling, it could be due to cleat misalignment.
5. Aligning Cleats Properly
Proper cleat alignment is essential for your comfort and performance. Start by loosening the cleat screws to allow for adjustment. Mount your cycling shoes and engage with the pedals. Pay attention to your natural foot alignment. The cleat should mirror this alignment, allowing your knees and feet to move naturally while pedaling. Make precise adjustments until you find the optimal alignment for your comfort and performance.
Dealing with Tightened Pedal Tension
(1) Indications of High Pedal Tension
High pedal tension can make clipping in and out a challenging task. Recognizing signs of excessively tightened pedal tension can help diagnose this issue:
1.Difficulty Clipping In or Out:
If you find it exceedingly difficult to engage with the pedals or disengage your feet, the tension may be too high.
2.Jerky Foot Movements:
Jerky or forceful foot movements during clipping indicate high pedal tension.
3.Foot Discomfort:
Excessive tension can lead to discomfort, particularly during extended rides.
4. Adjusting Pedal Tension
Adjusting pedal tension is typically done through a tension adjustment knob located on the Peloton pedal. Start by locating the knob and turning it counterclockwise to reduce tension. Begin with a small adjustment and test the pedals. Continue making minor adjustments until you find the tension that allows for smooth clipping in and out while providing the desired level of resistance during your ride.
Addressing Shoe Compatibility Issues
(1) Incompatible Shoes and Pedals
Clipping issues can also stem from using cycling shoes and pedals that are incompatible. Signs of incompatibility include:
1.Inability to Engage:
If you can’t clip in at all, your shoes and pedals may not be compatible.
2.Frequent Accidental Unclipping:
If you frequently unclip unintentionally during your ride, it may indicate a mismatch.
3.Difficulty Finding a Secure Position:
Struggling to find a secure and stable clipping position can be a sign of compatibility issues.
4. Finding the Right Match
To address compatibility problems, ensure that your cycling shoes and Peloton pedals are designed to work together. Research and consult manufacturer guidelines to identify compatible combinations. If necessary, invest in compatible shoes or adapter kits to ensure a seamless clipping experience. Matching the right components is vital for a hassle-free and enjoyable Peloton ride.
Tools and Equipment Needed
Essential Tools
When it comes to preparing for a successful Peloton ride and troubleshooting common clipping issues, having the right tools at your disposal is crucial. These essential tools will help you maintain and optimize your cycling setup:
1.Hex Keys (Allen Wrenches):
Hex keys of various sizes are indispensable for tightening or adjusting cleats on your cycling shoes. They allow for precise control and ensure a secure fit.
2.Cleat Lubricant:
A specialized cleat lubricant or silicone-based lubricant is essential for reducing friction between your cleats and the pedal mechanism. This lubrication eases the clipping-in process, ensuring smooth engagement.
3.Pedal Tension Adjustment Tool:
This tool is particularly useful if your Peloton pedals feature adjustable tension. It allows you to fine-tune the tension to your preference, ensuring a comfortable and efficient ride.
4.Screwdriver:
A screwdriver, typically Phillips or flat-head, may be needed for minor adjustments or maintenance tasks, such as checking and tightening pedal screws.
5.Clean Cloth or Brush:
Keeping your cycling shoes and pedals clean is essential. A cloth or brush is useful for removing dirt, debris, and sweat buildup, which can impact the cleat-pedal interface.
6.Safety Glasses:
While not directly related to clipping issues, safety glasses are crucial when performing maintenance tasks to protect your eyes from any debris that may dislodge during adjustments.
Having these essential tools readily available ensures that you can address common clipping problems promptly and efficiently, allowing you to enjoy uninterrupted Peloton workouts.
Additional Equipment for Troubleshooting
To the essential tools, certain troubleshooting scenarios may require Equipment to diagnose and resolve more complex clipping issues:
1.Cleat Alignment Tool:
A specialized cleat alignment tool provides precision in aligning your cleats to match your natural foot position. It can be particularly helpful if you struggle with cleat misalignment.
2.Pedal Maintenance Kit:
A pedal maintenance kit may include replacement parts, such as bearings or springs, to address pedal-related problems. It’s a valuable If you encounter issues beyond tension adjustment.
3.Shoe Compatibility Adapter Kits:
If you find that your cycling shoes and Peloton pedals are not compatible, adapter kits can bridge the gap. These kits may include different cleat types or mounting options to ensure a secure connection.
4.Torque Wrench:
A torque wrench is a precision tool that can be useful for tightening cleat screws to manufacturer-recommended specifications. This ensures that you don’t overtighten and damage your cycling shoes.
5.Pedal Grease:
Pedal grease is specifically formulated to lubricate pedal threads, ensuring smooth pedal installation and removal. It’s essential if you need to disassemble or replace pedals.
6.Shoe Inserts or Shims:
Inserts or shims can help fine-tune the alignment and fit of your cycling shoes. They are especially useful if you have unique foot anatomy or alignment requirements.
By having this Troubleshooting equipment and accessories on hand, you can tackle more challenging clipping issues and make precise adjustments to optimize your Peloton riding experience. These tools empower you to maintain your equipment and overcome any hurdles that may arise, ensuring that each ride is a seamless and enjoyable experience.
Step-by-Step Guide to Clipping In
Pre-Clip Inspection
Before embarking on your Peloton workout, it’s crucial to perform a pre-clip inspection to ensure a seamless and frustration-free ride. This step sets the foundation for a successful clipping experience.
Start by examining your cycling shoes and cleats. Ensure they are clean and free from debris, as even a small pebble or dirt speck can hinder the clipping process. Check the condition of your cleats, verifying that they are not worn or damaged. A damaged cleat can lead to instability and difficulty in engaging with the pedals.
Inspect the Peloton pedals for any foreign objects or obstructions that may interfere with the cleat-pedal interface. Once you’ve confirmed that both your shoes and pedals are in good condition, you’re ready to proceed with confidence.
Adjusting Cleat Position
Proper cleat positioning is the key to a smooth and efficient clipping experience. Cleats can be adjusted to match your unique foot angle and riding style, providing a personalized fit that minimizes discomfort and power transfer.
Start by loosening the cleat screws, allowing for adjustment. Then, mount your cycling shoes and engage with the pedals. Pay attention to the natural alignment of your feet and knees. Ideally, your feet should be in a neutral, comfortable position while riding.
Experiment with small adjustments, moving the cleats laterally and angularly until you find the sweet spot that aligns perfectly with your natural foot position. Remember that the optimal position may vary from person to person, so take the time to find what works best for you.
Lubricating the Cleats
Lubricating your cleats is a simple yet often overlooked step that can significantly improve the ease of clipping in. Over time, dust, dirt, and sweat can accumulate in the cleat-pedal interface, leading to friction and resistance.
To remedy this, apply a specialized cleat lubricant or a small amount of silicone-based lubricant to the cleat engagement points. This will reduce friction and ensure a smooth engagement with the pedals. Be cautious not to over-lubricate, as excess lubricant can attract more dirt and lead to premature wear.
Practice and Patience
Finally, mastering the art of clipping in on your Peloton bike requires practice and patience. Don’t be discouraged by initial difficulties or frustrations. Even experienced riders sometimes need a few tries to clip in smoothly.
Begin with deliberate, controlled motions as you engage with the pedals. Gradually increase your speed and fluidity with each attempt. Practice both clipping in and out to build confidence in your ability to handle any situation during your ride.
Remember that patience is your ally. Celebrate each successful clip-in and view any challenges as opportunities to refine your technique. Over time, clipping in will become second nature, allowing you to focus on the exhilaration of your Peloton workout.
Troubleshooting Tips
Persistent Clipping Issues
1. When to Seek Professional Help
Despite your best efforts, persistent clipping issues can occasionally plague your Peloton experience. In such cases, knowing when to seek professional help is crucial to avoid further frustration and potential damage to your equipment.
If you find that your clipping problems persist despite thorough self-diagnosis and adjustments, it’s a clear signal that it’s time to involve a professional. Consider these situations:
Unresolved Misalignment:
When cleat misalignment remains a persistent issue despite repeated adjustments, a professional bike fitting may be necessary. A trained specialist can assess your unique biomechanics and recommend tailored solutions.
Recurring Mechanical Problems:
If you encounter recurring issues with your Peloton pedals, such as pedal tension problems or pedal wear, it’s advisable to consult a bicycle technician or Peloton support. They can diagnose underlying mechanical issues and provide expert solutions.
Chronic Discomfort or Pain:
Ongoing discomfort, pain, or numbness while riding can be signs of more significant problems, including biomechanical issues or improper bike fit. Seeking a professional fitting or medical evaluation can address these concerns.
Remember that professional assistance can save you time and frustration in the long run, ensuring that your Peloton setup is optimized for comfort and performance.
Temporary Solutions
When faced with immediate clipping issues during a Peloton session, knowing some temporary solutions can help you continue your ride without major disruptions. These quick fixes can be invaluable:
Lubrication:
If you experience difficulty clipping in due to friction or resistance, applying a small amount of cleat lubricant can provide temporary relief. This lubrication reduces friction between the cleats and pedals, allowing for smoother engagement.
Cleat Adjustment on the Fly:
If you sense misalignment during your ride, try making minor cleat adjustments while stationary. Loosen the cleat screws slightly and realign your foot position to improve comfort. Just remember to retighten the screws securely afterward.
Reduced Pedal Tension:
If high pedal tension is causing issues, use your pedal tension adjustment tool to reduce tension temporarily. This can make clipping in and out easier for the remainder of your ride.
These temporary solutions are handy for addressing immediate concerns and ensuring that your workout remains productive and enjoyable.
Avoiding Common Mistakes
Preventing clipping issues begins with avoiding common mistakes that can compromise your setup and riding experience. Be mindful of the following pitfalls:
Neglecting Maintenance:
Regularly inspect and maintain your cycling shoes, cleats, and Peloton pedals. Neglecting maintenance can lead to wear and tear, reducing the effectiveness of your setup.
Overlooking Cleat Alignment:
Cleat alignment is critical for comfort and efficiency. Ensure your cleats match your natural foot position to avoid discomfort and potential injury.
Ignoring Pedal Tension:
Adjust pedal tension to match your preference. Avoid excessive tension that can make clipping difficult and uncomfortable, or too loose tension that may result in accidental unclipping.
By staying vigilant and avoiding these common mistakes, you can proactively reduce the likelihood of clipping issues during your Peloton rides. This proactive approach contributes to a smoother and more enjoyable cycling experience.
Peloton-Specific Considerations
Understanding Peloton Pedals
To maximize your Peloton experience, it’s essential to have a deep understanding of Peloton-specific pedals. These pedals are a crucial component of your setup, and knowing their features and functions will greatly enhance your riding experience.
1. Clipless Pedals:
Peloton bikes come equipped with clipless pedals, which require compatible cycling shoes and cleats for engagement. Unlike traditional platform pedals, clipless pedals secure your feet in place, allowing for more efficient power transfer and stability during your ride.
2. Adjustable Tension:
Peloton pedals often feature adjustable tension settings. This means you can fine-tune the resistance needed to engage and disengage your cleats. Adjusting tension to your preference is vital for a comfortable and secure clipping experience.
3. Maintenance:
Regular maintenance of your Peloton pedals is essential for their longevity and optimal performance. Periodically check for wear and tear, clean the pedal mechanisms, and lubricate moving parts as needed to ensure smooth operation.
Peloton Cleat Compatibility
Ensuring that your cleats are compatible with Peloton pedals is a fundamental aspect of your setup. Cleat compatibility directly impacts your ability to clip in securely and ride comfortably. Here’s what you need to know:
1. Peloton-Specific Cleats:
Peloton offers its own branded cleats designed to work seamlessly with Peloton pedals. These cleats are typically included with the purchase of your Peloton bike. Using these cleats ensures a perfect match and hassle-free clipping.
2. 3-Bolt Cleat System:
Peloton pedals use a 3-bolt cleat system, which is a standard in the cycling industry. This means you have options beyond Peloton-branded cleats. Many reputable cycling shoe manufacturers offer compatible cleats, providing you with choices for fit and style.
3. Cleat Alignment:
Regardless of the cleats you choose, proper cleat alignment is crucial. Align the cleats on your cycling shoes so they match your natural foot position. Misaligned cleats can lead to discomfort, inefficiency, and potential injury.
Peloton Support Resources
Peloton offers a wealth of support To assist you in resolving any issues and optimizing your riding experience. Familiarize yourself with these To make the most of your Peloton journey:
1. Online Support Portal:
Peloton’s official website features a comprehensive support portal. Here, you can access FAQs, troubleshooting guides, and video tutorials to address common problems and questions.
2. Customer Support:
Peloton’s customer support team is readily available via phone, email, or live chat. Don’t hesitate to reach out if you encounter issues beyond your ability to resolve or need personalized assistance.
3. Community Forums:
Peloton boasts a vibrant and active online community of riders. Participating in these forums can connect you with fellow Peloton enthusiasts who can offer insights, tips, and solutions based on their experiences.
4. Professional Services:
Peloton also offers professional services such as bike fitting and maintenance through its Peloton Home Services program. If you prefer a hands-on approach to addressing clipping issues, consider booking a professional service appointment.
Understanding Peloton-specific pedals, ensuring cleat compatibility, and utilizing Peloton’s support Empowers you to overcome challenges and enjoy a seamless, comfortable, and productive riding experience. As you delve deeper into your Peloton journey, this knowledge will prove invaluable in enhancing your overall fitness and enjoyment.
Safety Precautions
Cycling Shoe Safety
Ensuring your safety while riding your Peloton begins with giving due consideration to your cycling shoes. These indispensable accessories play a significant role in your overall riding experience and safety.
1. Proper Shoe Fit:
The foremost safety consideration revolves around the fit of your cycling shoes. Your shoes should strike a balance between being snug and overly tight. Ensure that there’s ample room for your toes to move comfortably while securing your heels in place. An ill-fitting shoe can lead to discomfort and, in some cases, accidents.
2. Secure Cleat Attachment:
Pay meticulous attention to how your cleats are attached to your cycling shoes. Verify that they are fastened securely with no loose screws or components. Loose cleats have the potential to undermine your stability and control while riding.
3. Walking Safely:
Keep in mind that cycling shoes are primarily designed for riding, not walking. Exercise caution when walking in your cleats, as they can be slippery on hard surfaces. Be vigilant in areas where the risk of slipping or losing traction exists.
4. Protecting Home Surfaces:
If you’re using your Peloton at home, take preventive measures to shield your floors from damage. When not riding, consider removing or covering your cleats to prevent unsightly scuffs or scratches on delicate surfaces.
Pedal Safety
Pedals constitute a critical component of your Peloton setup, and ensuring their safety is paramount for a secure and comfortable ride.
1. Regular Pedal Maintenance:
Establish a routine for inspecting your Peloton pedals to detect any signs of wear and tear. Look out for loose parts, damaged threads, or any irregularities in pedal function. Promptly addressing such issues is key to preventing accidents.
2. Proper Installation:
During the initial setup of your Peloton, take care to ensure that the pedals are installed correctly and tightened according to the manufacturer’s specifications. Incorrect installation can result in instability and unsafe riding conditions.
3. Thoughtful Tension Adjustment:
While it’s important to adjust pedal tension to your liking, exercise caution not to set it excessively high. Excessive tension can make clipping in and out a challenging task, potentially leading to accidents, especially during intense workouts.
4. Pedal Alignment:
Pay heed to the alignment of your pedals. Verify that they are correctly positioned to prevent any discomfort or strain on your knees or feet during your rides. Misaligned pedals can create uneven pressure on your joints.
5. Emergency Stop Familiarity:
Take the time to acquaint yourself with the emergency stop feature on your Peloton bike. In the event of sudden issues or discomfort during your ride, knowing how to halt the pedals safely is crucial.
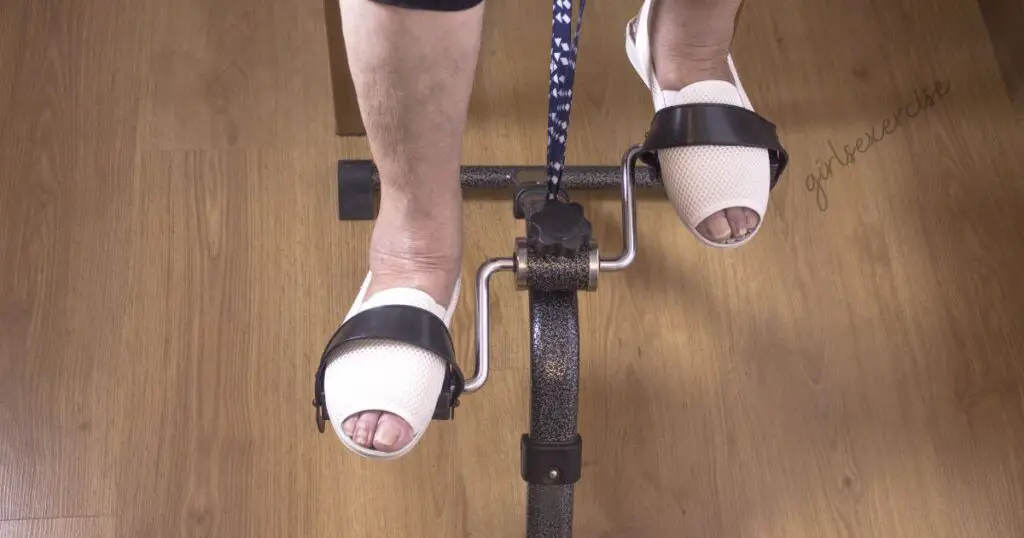
6. Appropriate Footwear:
Always don the appropriate cycling shoes when riding your Peloton. Refrain from using regular sneakers or shoes lacking cleats, as these can compromise your stability and result in accidents.
Prioritizing safety with your cycling shoes and pedals enhances your overall riding experience by reducing the risk of accidents or discomfort. By conscientiously following these precautions, you can derive maximum enjoyment from your Peloton workouts while safeguarding your well-being.
Maintenance and Long-Term Clipping Success
Regular Cleat Inspections
To ensure long-term clipping success and an enjoyable Peloton riding experience, regular cleat inspections are essential. Here’s why they matter:
1. Wear and Tear:
Over time, cleats can wear down due to the friction and pressure exerted during rides. Inspecting them regularly allows you to identify signs of wear, such as thinning or uneven surfaces.
2. Screw Tightness:
Cleats are secured to your cycling shoes with screws. Frequent use can cause these screws to loosen. Regular inspections help you identify loose screws and prevent accidental detachment during rides.
3. Alignment:
Maintaining proper cleat alignment is crucial for comfort and efficiency. Periodic inspections help you ensure that your cleats are correctly positioned to match your natural foot stance.
4. Safety:
Loose or worn cleats can compromise your safety on the bike. By inspecting them routinely, you reduce the risk of accidents or discomfort while riding.
To conduct a cleat inspection, remove your cleats from your cycling shoes and examine them closely. Check for signs of wear, tighten any loose screws, and verify alignment. If you notice significant wear or damage, it’s time to consider replacing your cleats.
Replacing Worn Components
The longevity of your Peloton setup depends on proactive component replacement. Here’s why it’s vital:
1. Cleat Replacement:
Cleats are subject to wear and tear, and their lifespan depends on factors like ride frequency and pedal tension. When cleats show significant wear or damage that cannot be remedied through adjustment, it’s time to replace them to maintain optimal clipping performance.
2. Pedal Maintenance:
Peloton pedals are built to last, but regular use can lead to wear in components such as bearings and springs. Replacement parts are available, and timely replacement ensures the pedals operate smoothly and safely.
3. Shoe Care:
Cycling shoes also require maintenance. Regularly check the soles for wear, and replace your shoes if you notice significant damage or deterioration. Worn-out shoes can affect cleat engagement and stability.
4. Comfort and Efficiency:
Replacing worn components ensures that you ride comfortably and efficiently. Worn cleats or pedals can lead to discomfort, decreased power transfer, and an increased risk of injury.
Keep track of the usage and condition of your cycling shoes, cleats, and pedals. Replace components as needed to maintain optimal performance and safety on your Peloton bike.
Maintaining Optimal Shoe Condition
Your cycling shoes are a critical part of the clipping system, and their condition directly impacts your riding experience. Here’s why maintaining their optimal condition matters:
1. Sole Integrity:
Regularly inspect the soles of your cycling shoes for signs of wear or damage. Ensure that they remain sturdy and provide a stable platform for your cleats.
2. Cleat Compatibility:
As your cleats may vary in design and thickness, periodically check that they still align perfectly with your cycling shoes. Minor adjustments may be necessary to maintain compatibility.
3. Hygiene:
Sweat and moisture can accumulate inside your shoes, leading to odor and potential discomfort. Allow your shoes to dry thoroughly after each ride, and consider using shoe deodorizers or insoles to maintain freshness.
4. Fit and Comfort:
Over time, your feet may change slightly, affecting the fit of your cycling shoes. Pay attention to any discomfort or pressure points and consider adjustments or replacements if necessary.
5. Cleaning:
Regularly clean your cycling shoes to remove dirt, grime, and sweat. This not only maintains their appearance but also ensures the longevity of materials and components.
By prioritizing the maintenance of your cycling shoes, cleats, and pedals, you’ll enjoy a consistent and hassle-free clipping experience on your Peloton bike. This not only enhances your comfort but also extends the lifespan of your equipment, ultimately contributing to your long-term cycling success.
Conclusion:
The inability to clip into your Peloton can be a frustrating roadblock on your fitness journey. However, armed with the knowledge of proper cycling shoe setup, troubleshooting techniques, and a supportive Peloton community, you can overcome this challenge.
Remember that safety, motivation, and shared experiences are essential components of your Peloton adventure. By staying informed and engaged, you can fully enjoy the Peloton experience and achieve your fitness goals with confidence and determination. Happy riding!
FAQS On Can’t Clip Into Peloton?
Why am I having trouble clipping into my Peloton?
Trouble clipping into your Peloton can result from various factors. It could be due to loose cleats, misaligned cleats, tightened pedal tension, or shoe compatibility issues.
How do I know if my cleats are loose?
Signs of loose cleats include a clicking or shifting sensation when you pedal, difficulty engaging the cleat into the pedal, or a wobbly feeling while riding.
What should I do if my cleats are loose?
To tighten cleats, use the appropriate tools to secure the screws connecting them to your cycling shoes. Ensure they are snug but not overtightened to maintain mobility.
How can I tell if my cleats are misaligned?
Misaligned cleats can cause discomfort, knee pain, or difficulty maintaining proper pedal stroke. Signs include your feet not feeling centered on the pedals or experiencing unusual pressure points.
How can I align my cleats properly?
To align cleats, start by marking the position where they currently sit. Then, make gradual adjustments until your feet feel centered and comfortable. Consult your bike’s manual or a professional if needed.
What can I do if the pedal tension is too tight?
High pedal tension can make clipping in and out difficult. Adjust it using the tension adjustment feature on your Peloton bike or pedals, making it easier to engage and disengage.


1 thought on “Can’t Clip Into Peloton?”